DepthTouch: Construction Manual
Part list for the frame
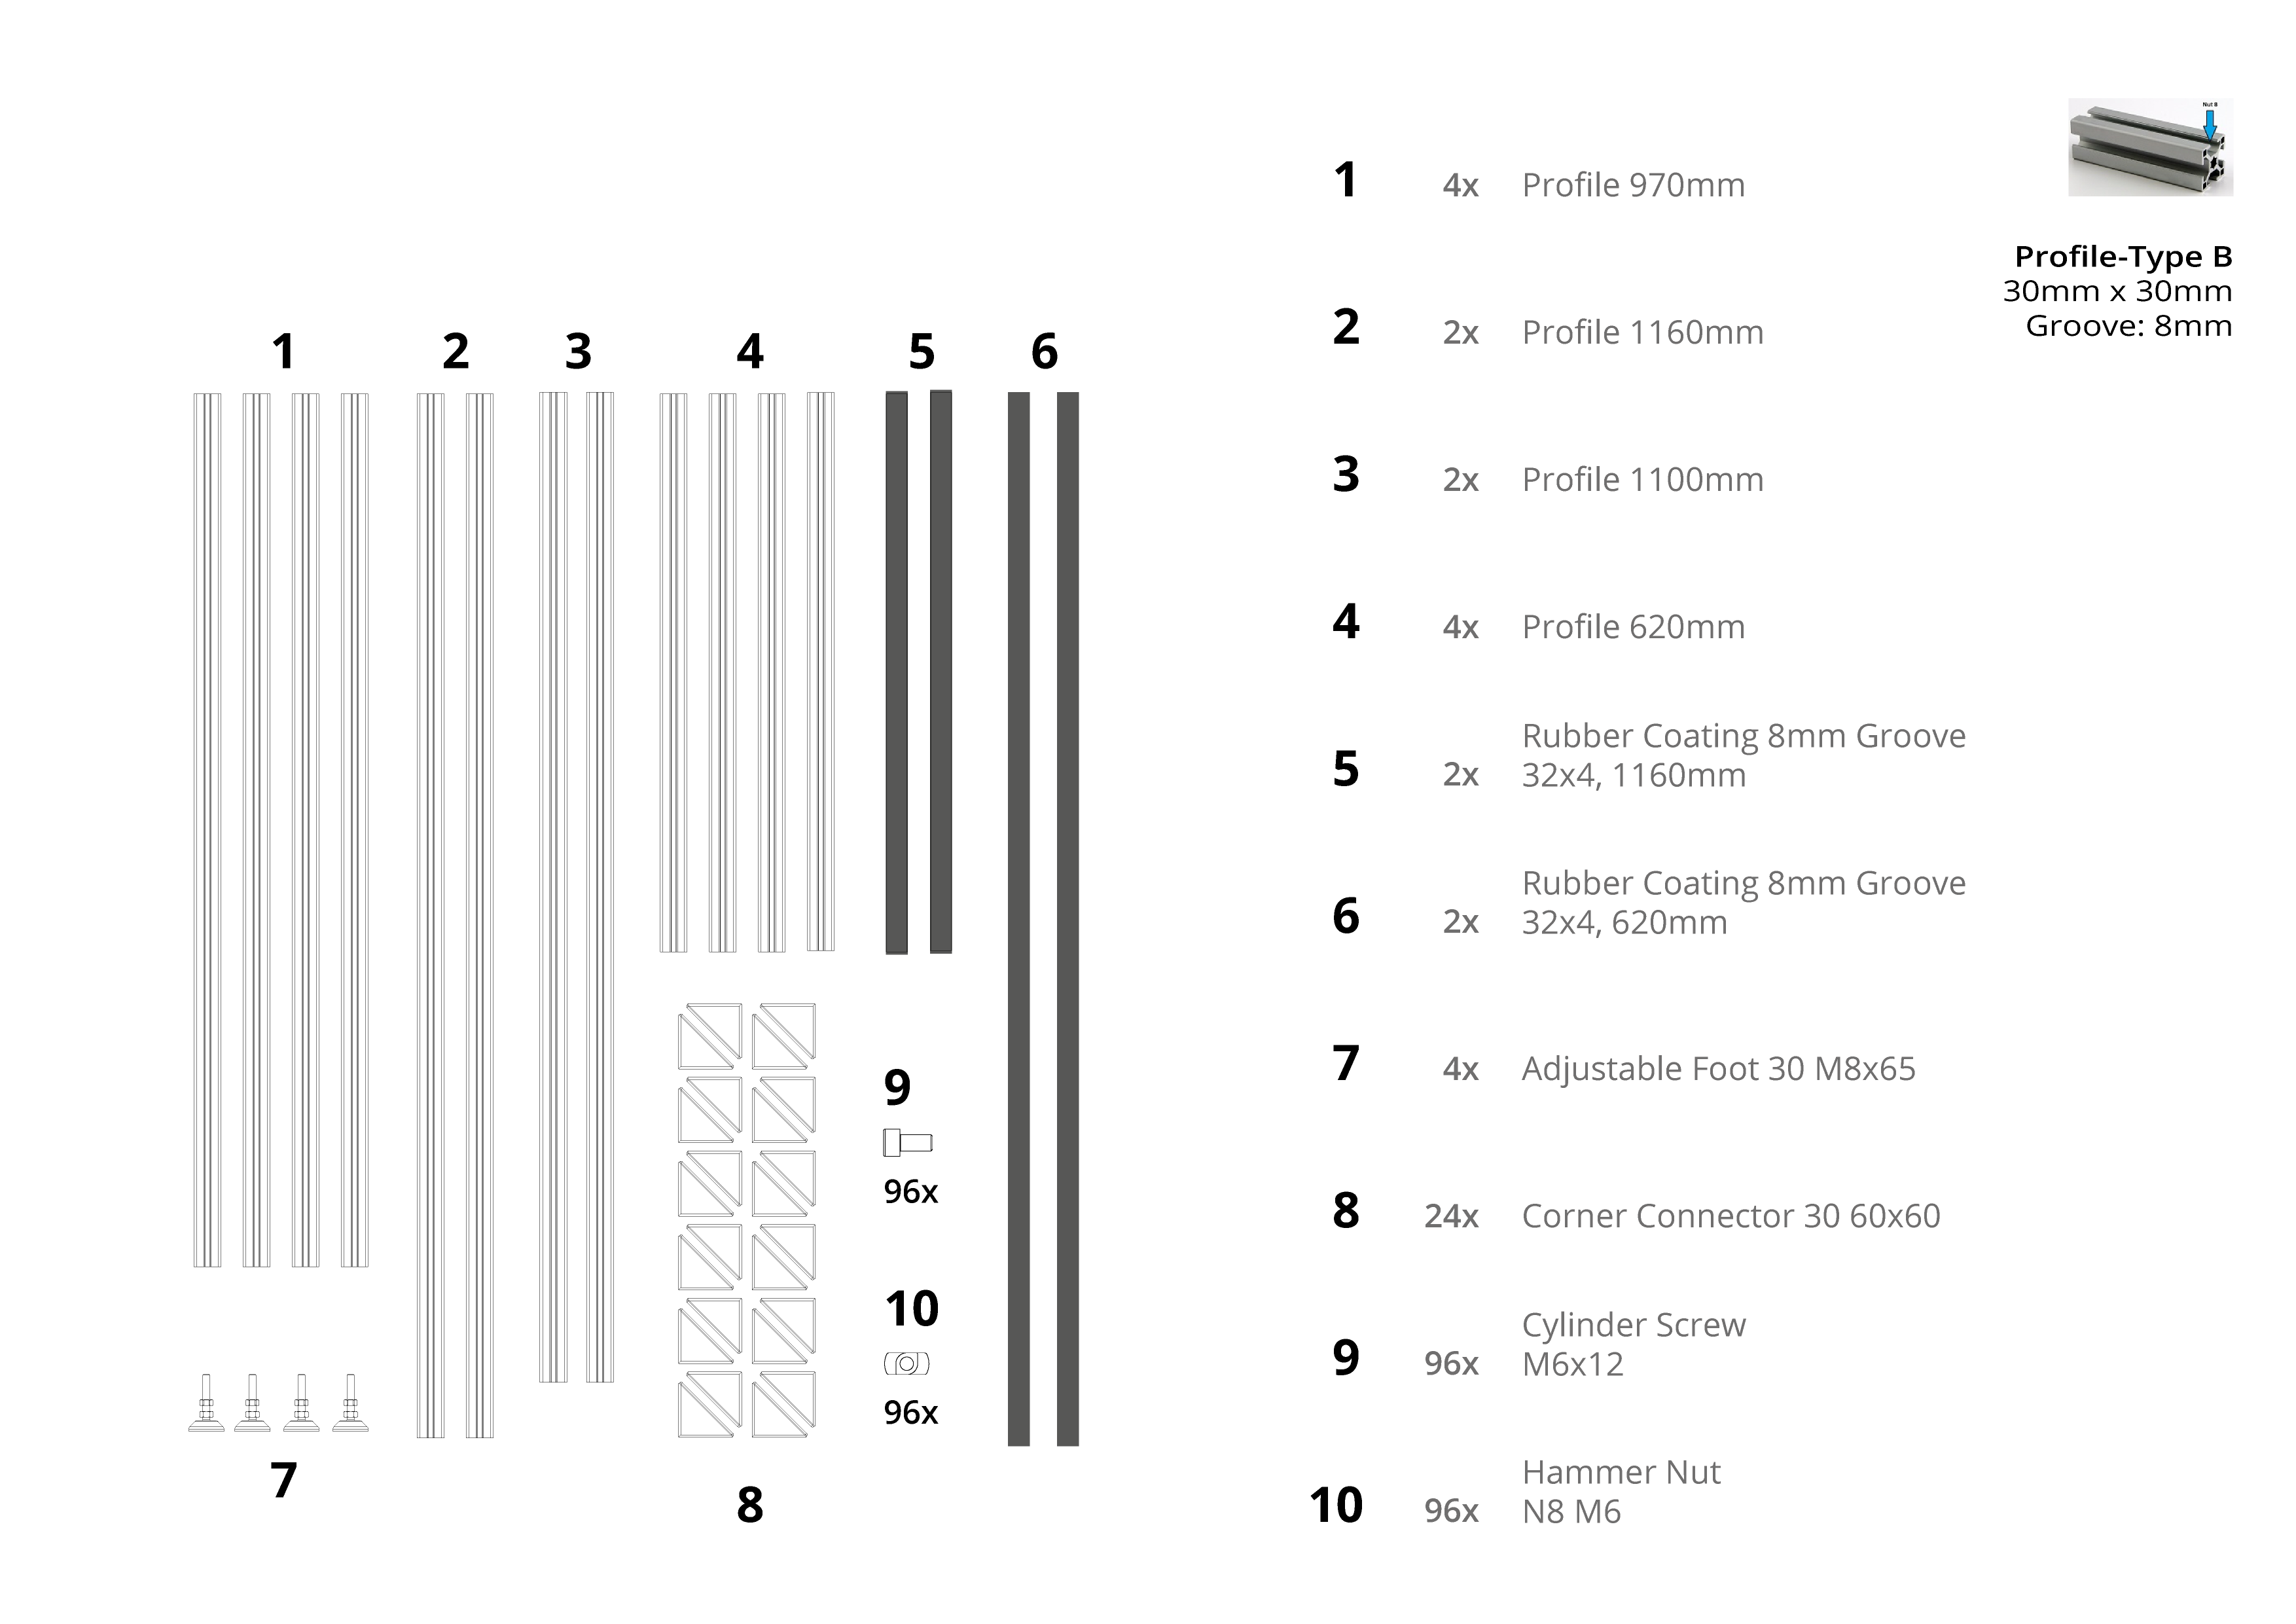
1 / 20
Start with assembling the upper frame with 1160mm profiles (2) and 620mm profiles (4)

2 / 20
Connect the sides of the table with the 970 mm profiles (1)

3 / 20
Fasten the sides with corner elements (8)

4 / 20
Side elements should be attached to two corners each

5 / 20
Continue with the lower frame - 1100mm profile (3) and 620mm profiles (4) and three corner elements (8) for each side
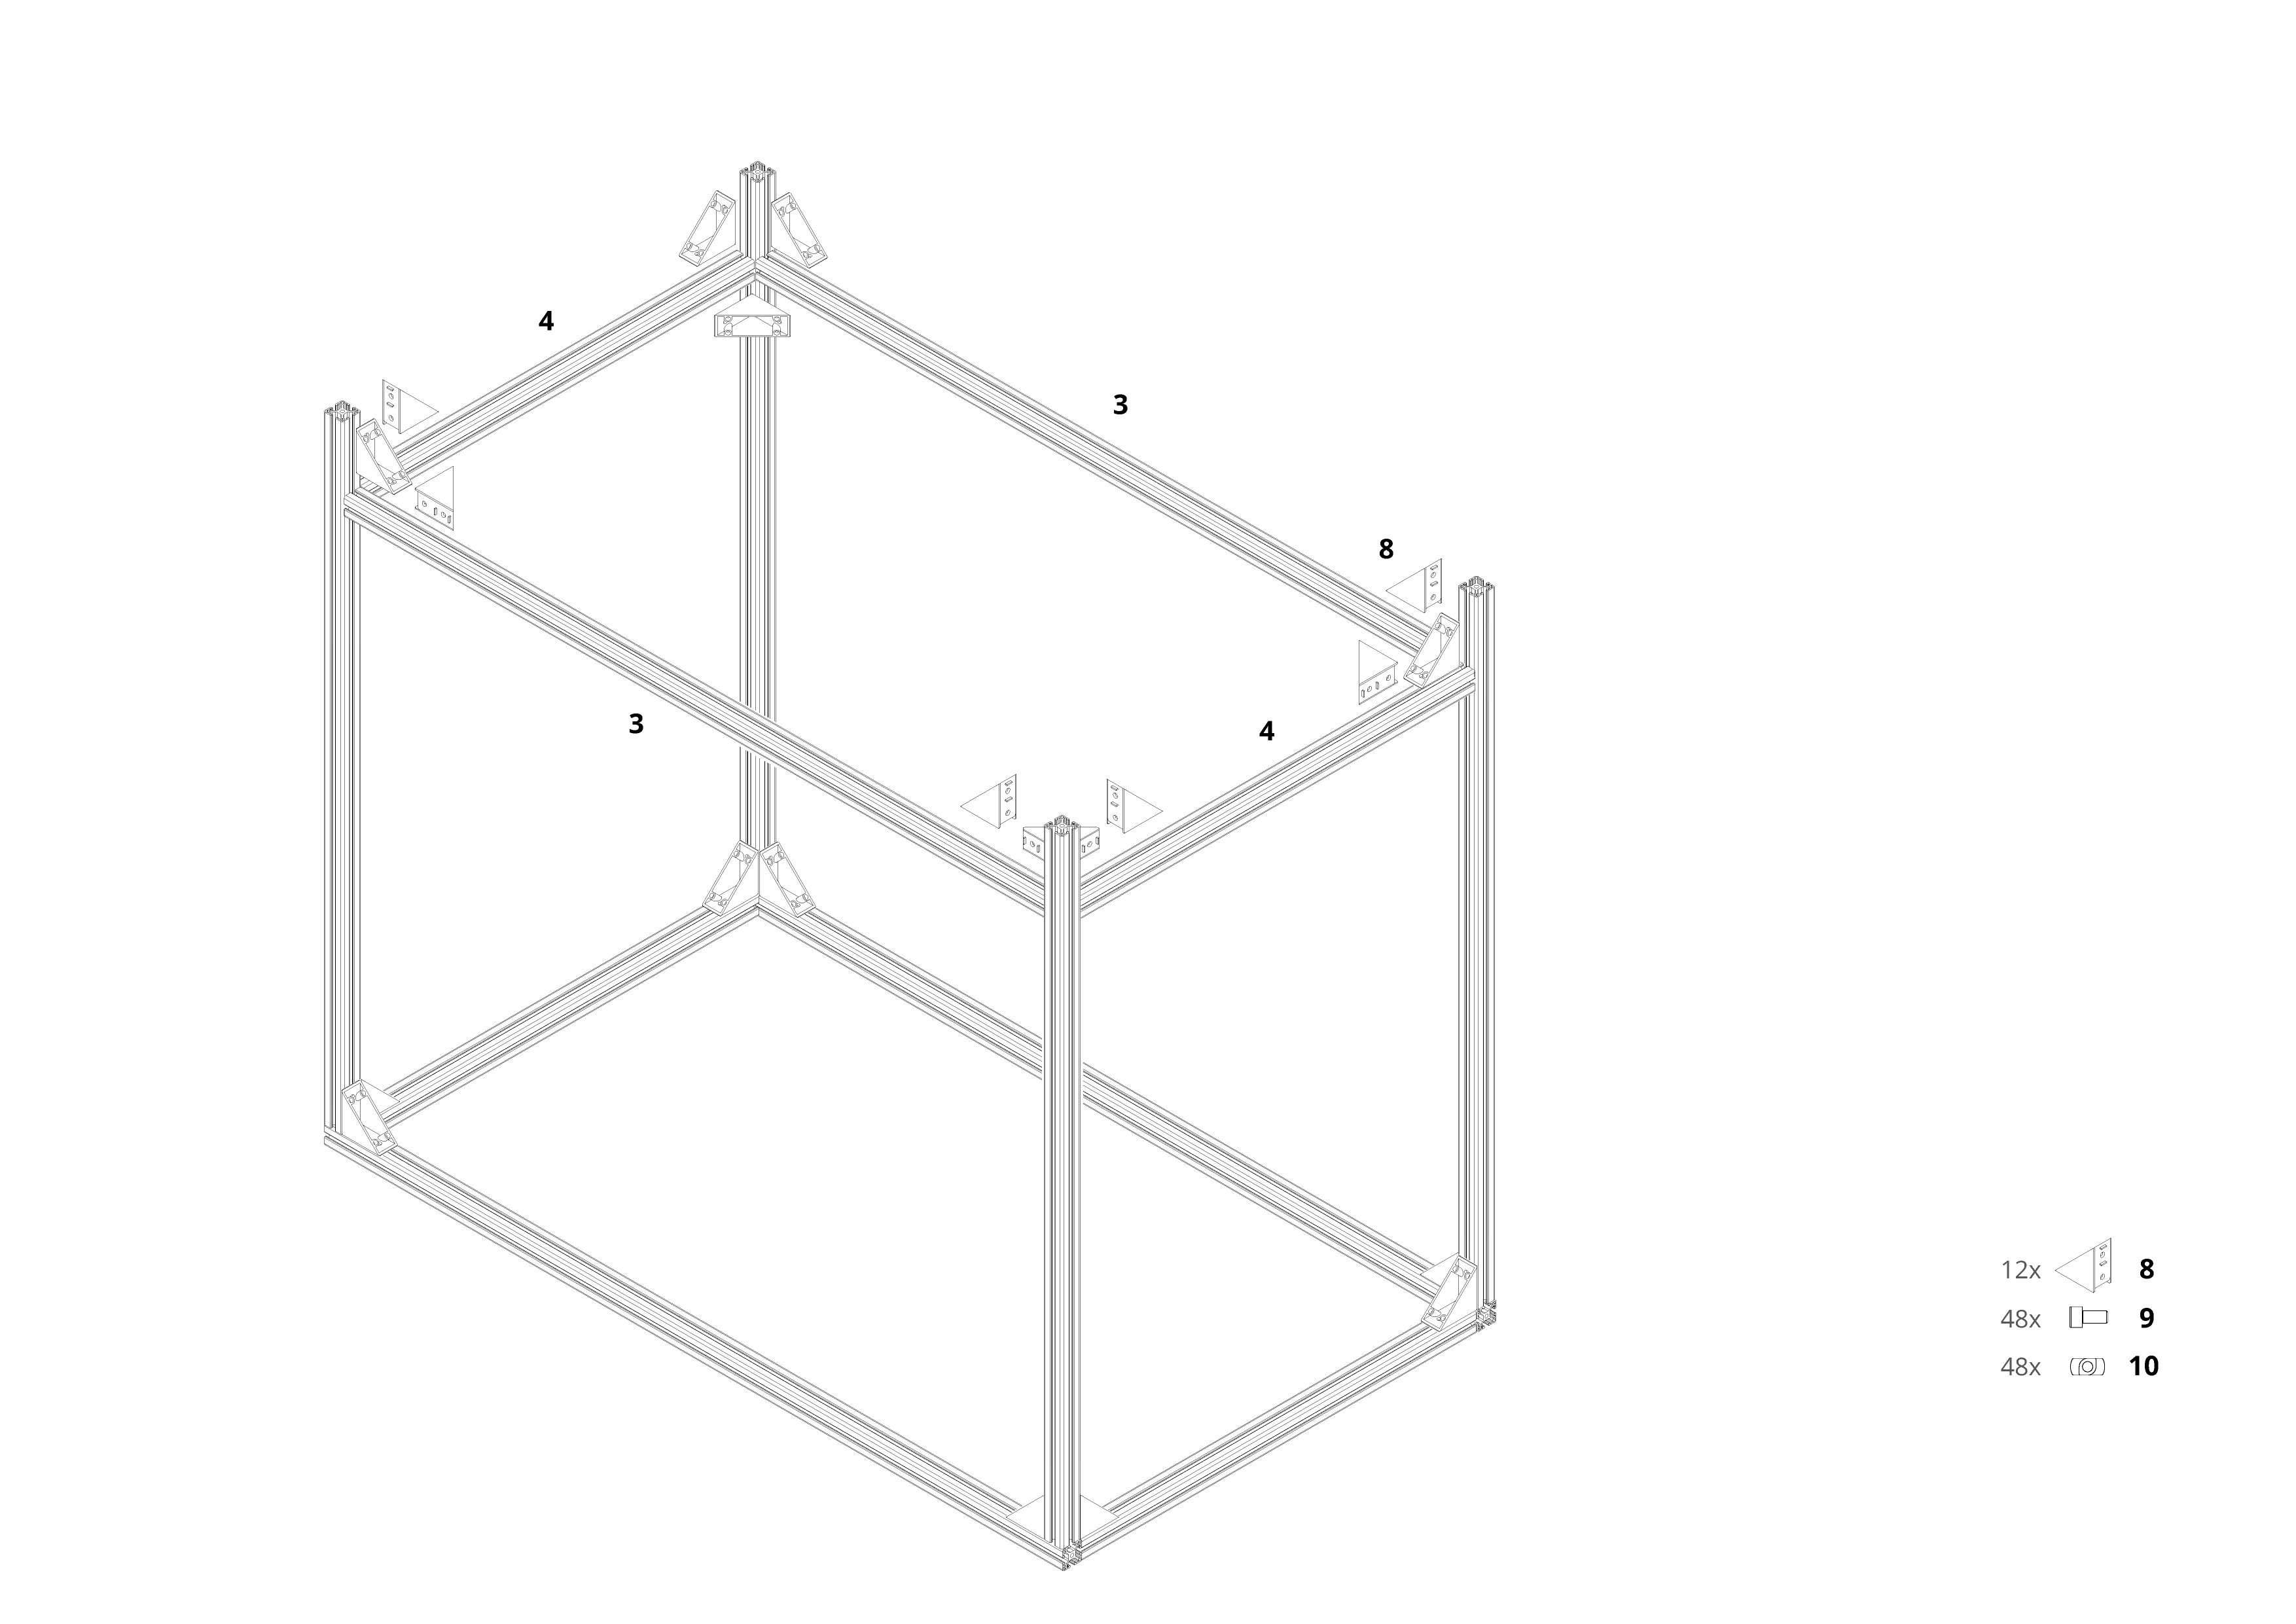
6 / 20
Finally, drill the feet into the holes of the side profiles
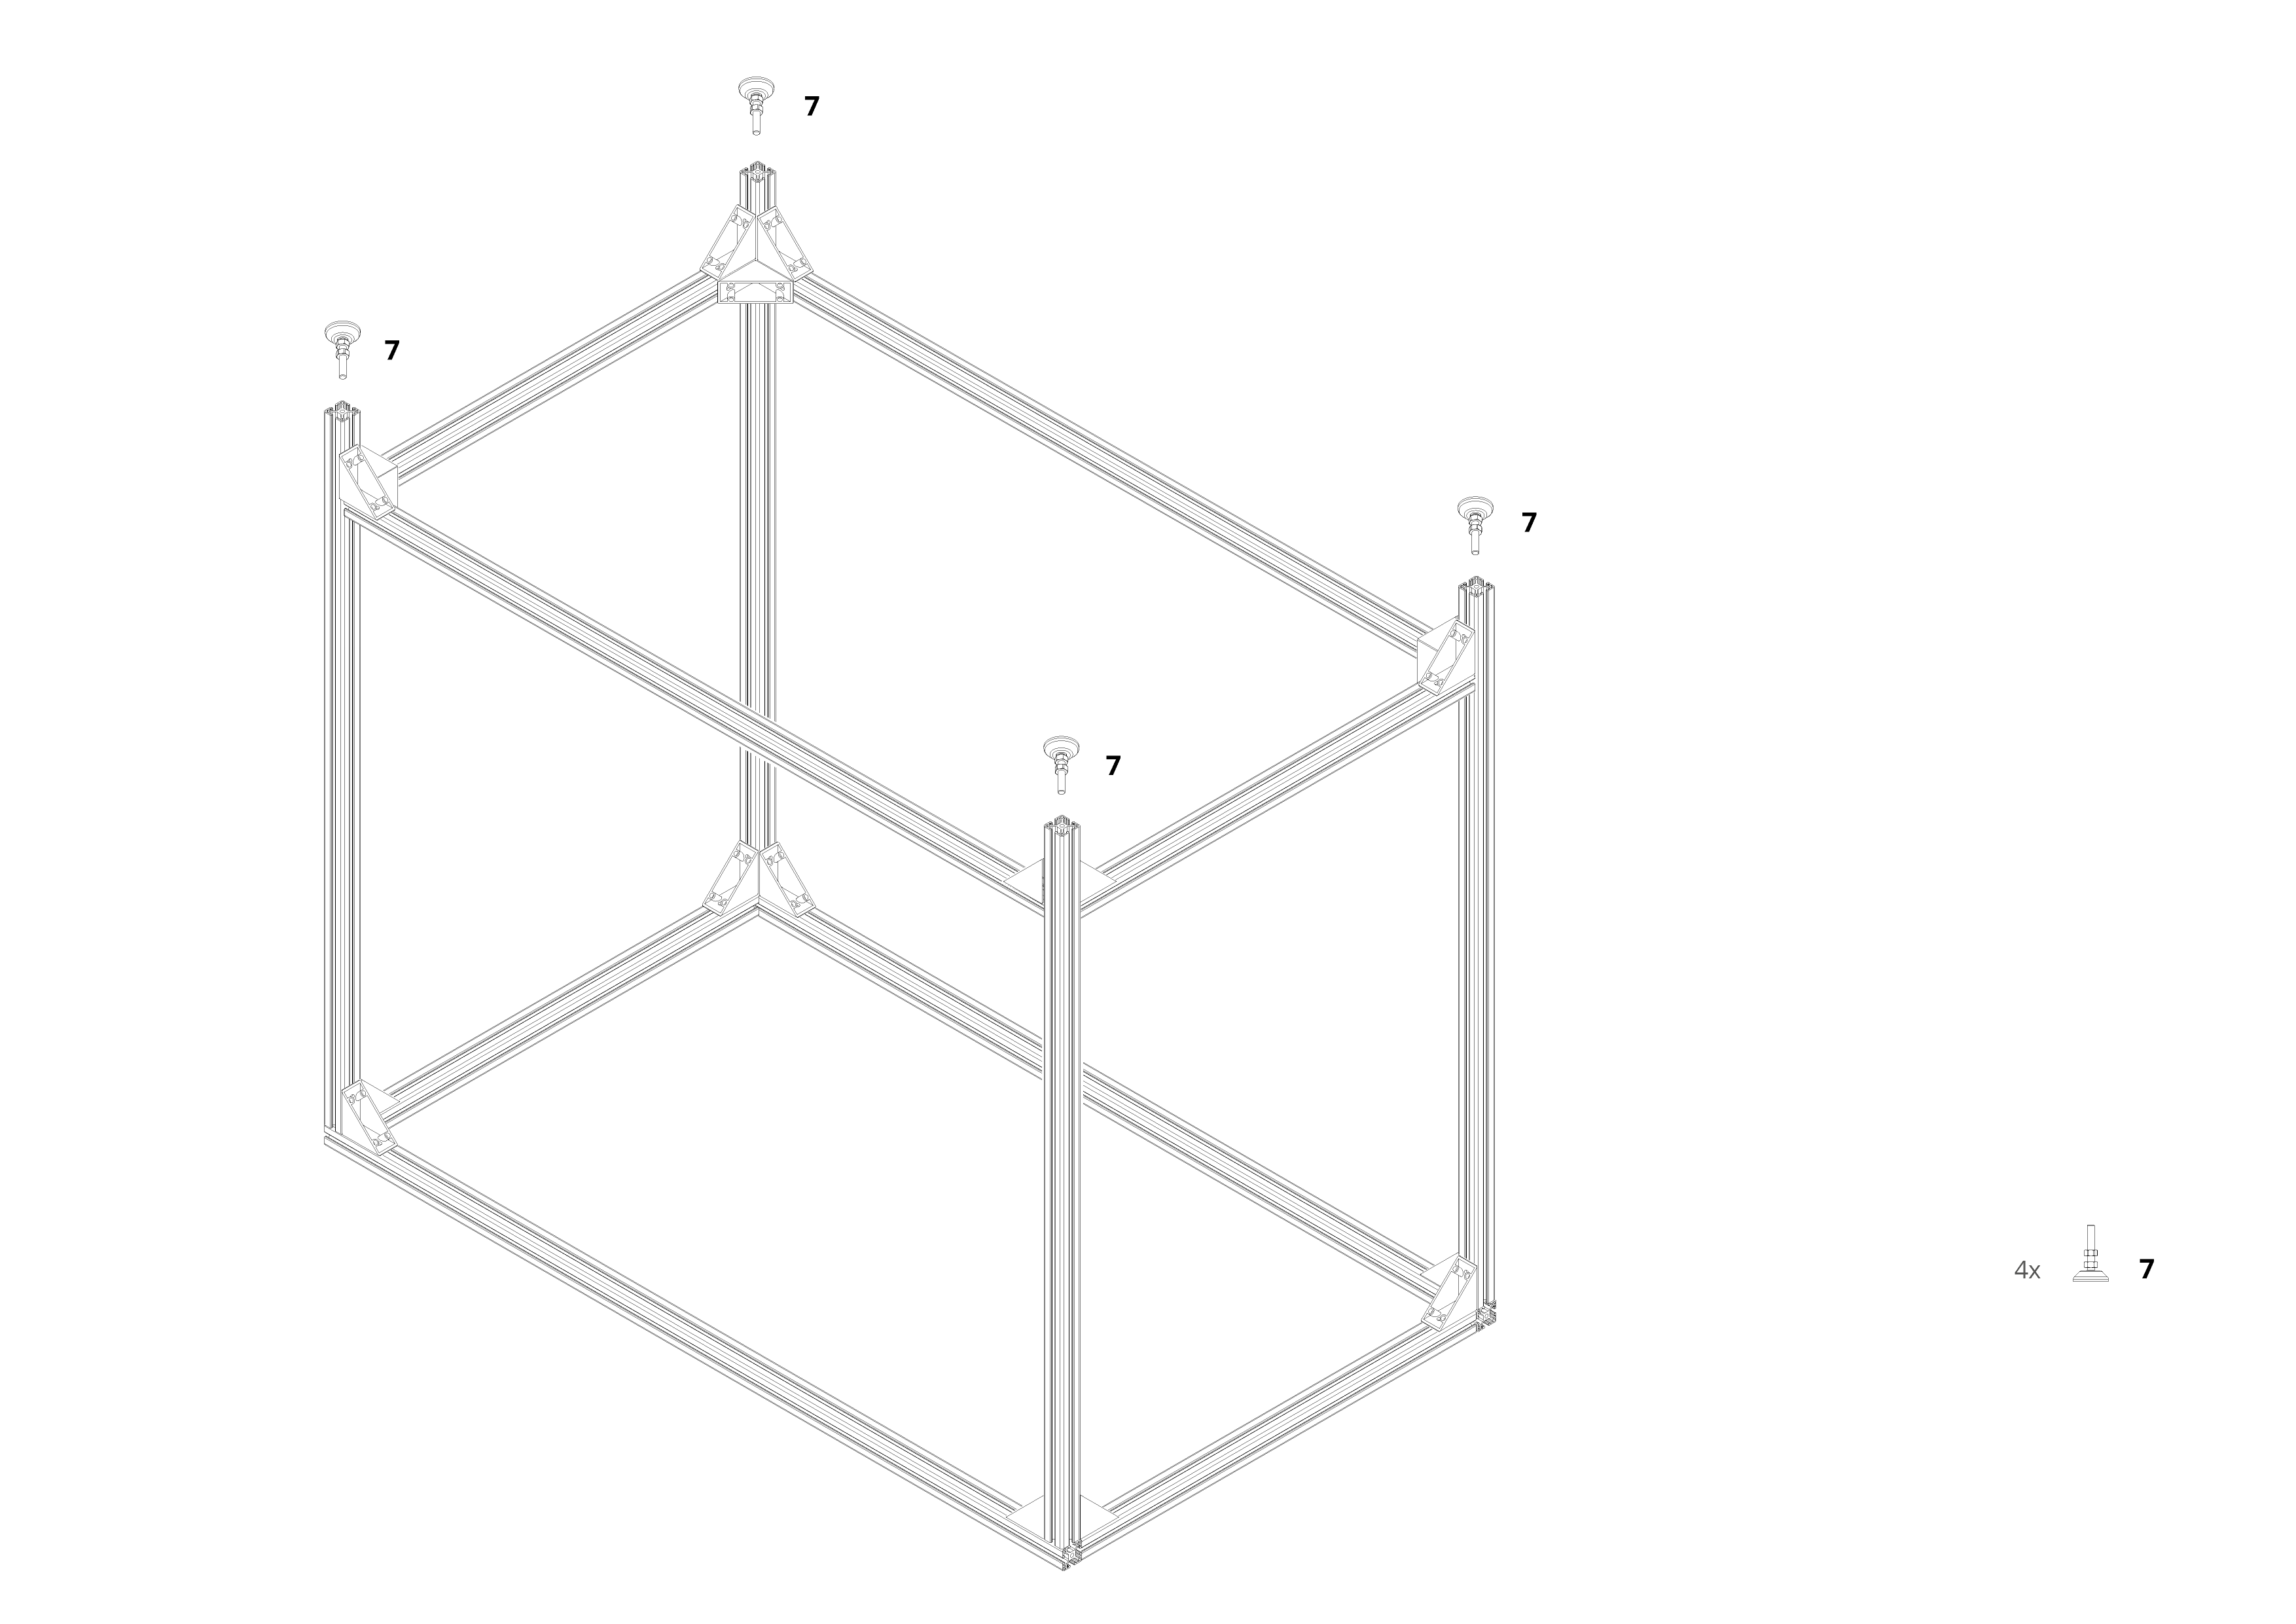
7 / 20
Flip the table onto its feet, and adjust feet for firm stand
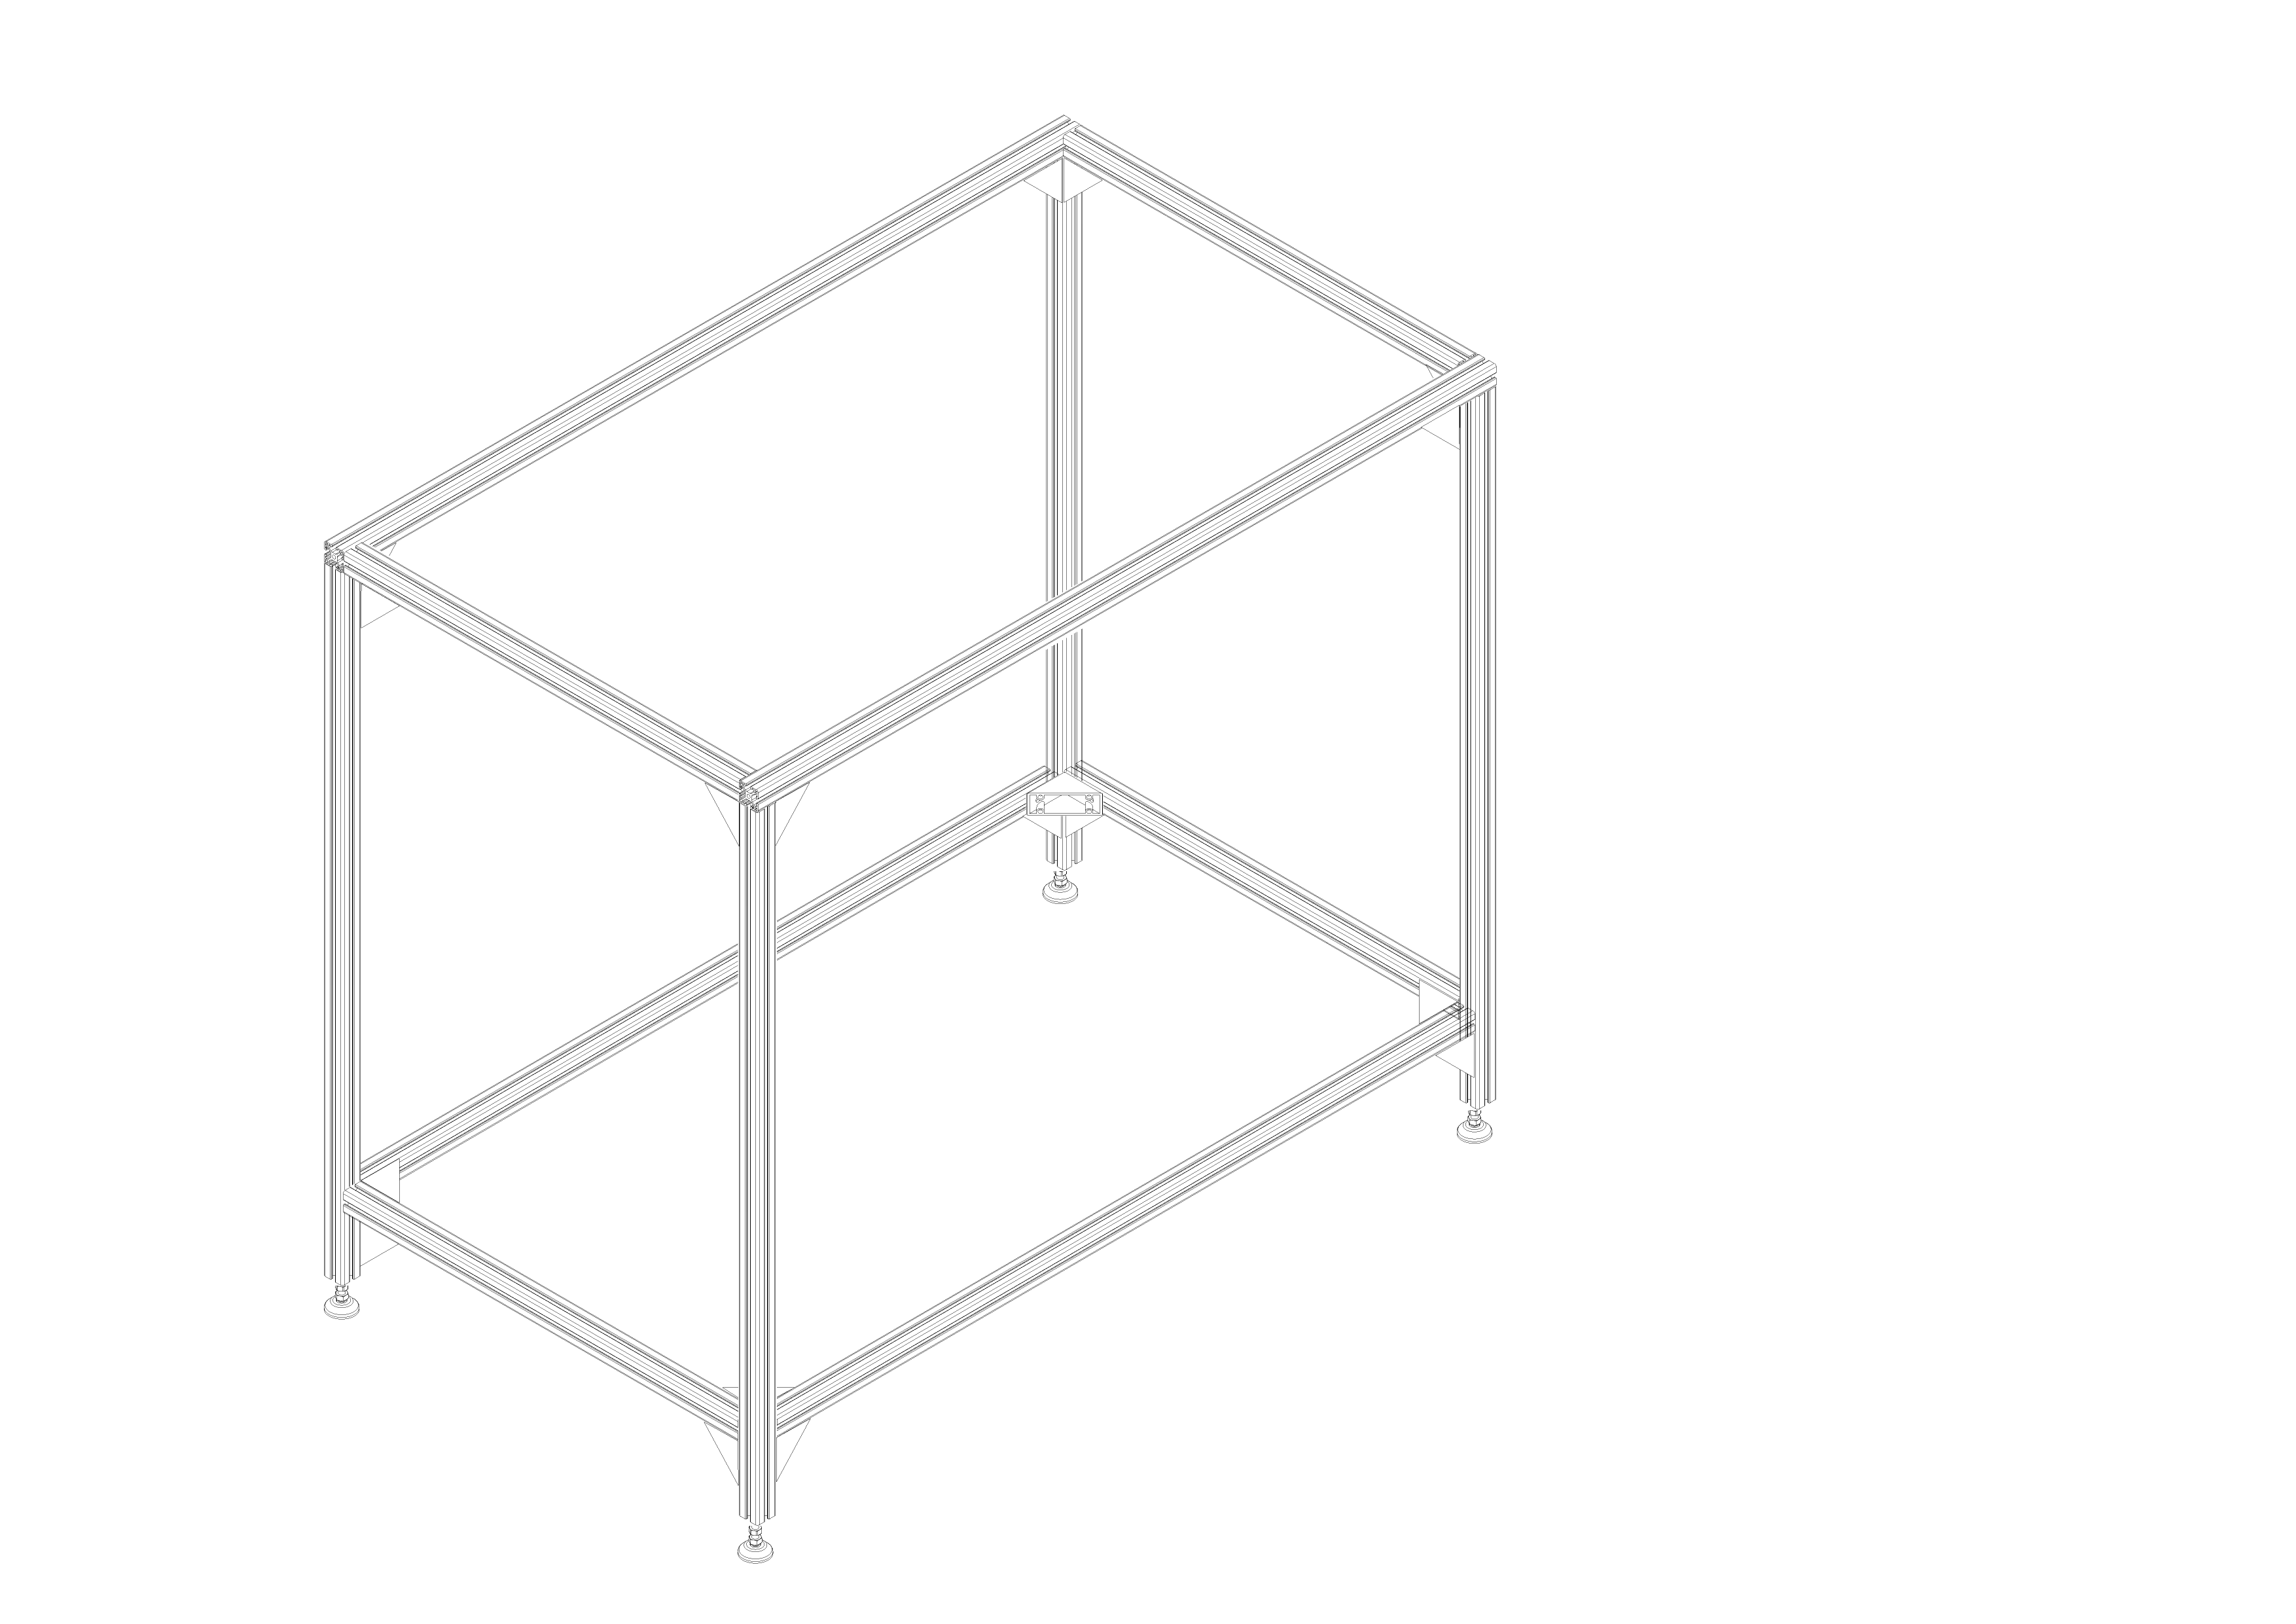
8 / 20
Part list for projector / camera mount

9 / 20
Start with the 450mm profiles (12)

10 / 20
Connect the 680mm profiles (13)

11 / 20
Add another 450mm profile (12) which will hold the camera later.

12 / 20
On the opposite side, connect the pivoting elements for the projector table (22) mounted on the 200mm profiles (14)

13 / 20
Continue with the base for the projector by connecting the 330mm (15) profiles and the 350mm profiles (16) with corner elements (25)

14 / 20
Attach another 330mm profile (15)

15 / 20
Connect the frames by inserting the small frame in the pivoting elements

16 / 20
Mount the projector onto the small frame by either using a custom plate or the optional ceiling mount, which can be disassembled and connected to the cross brace of the small frame

17 / 20
Use the 300mm profile (11) to mount the camera and its head to the frame

18 / 20
Both camera and projector should look inwards

19 / 20
Connect the projector / camera mount with the table
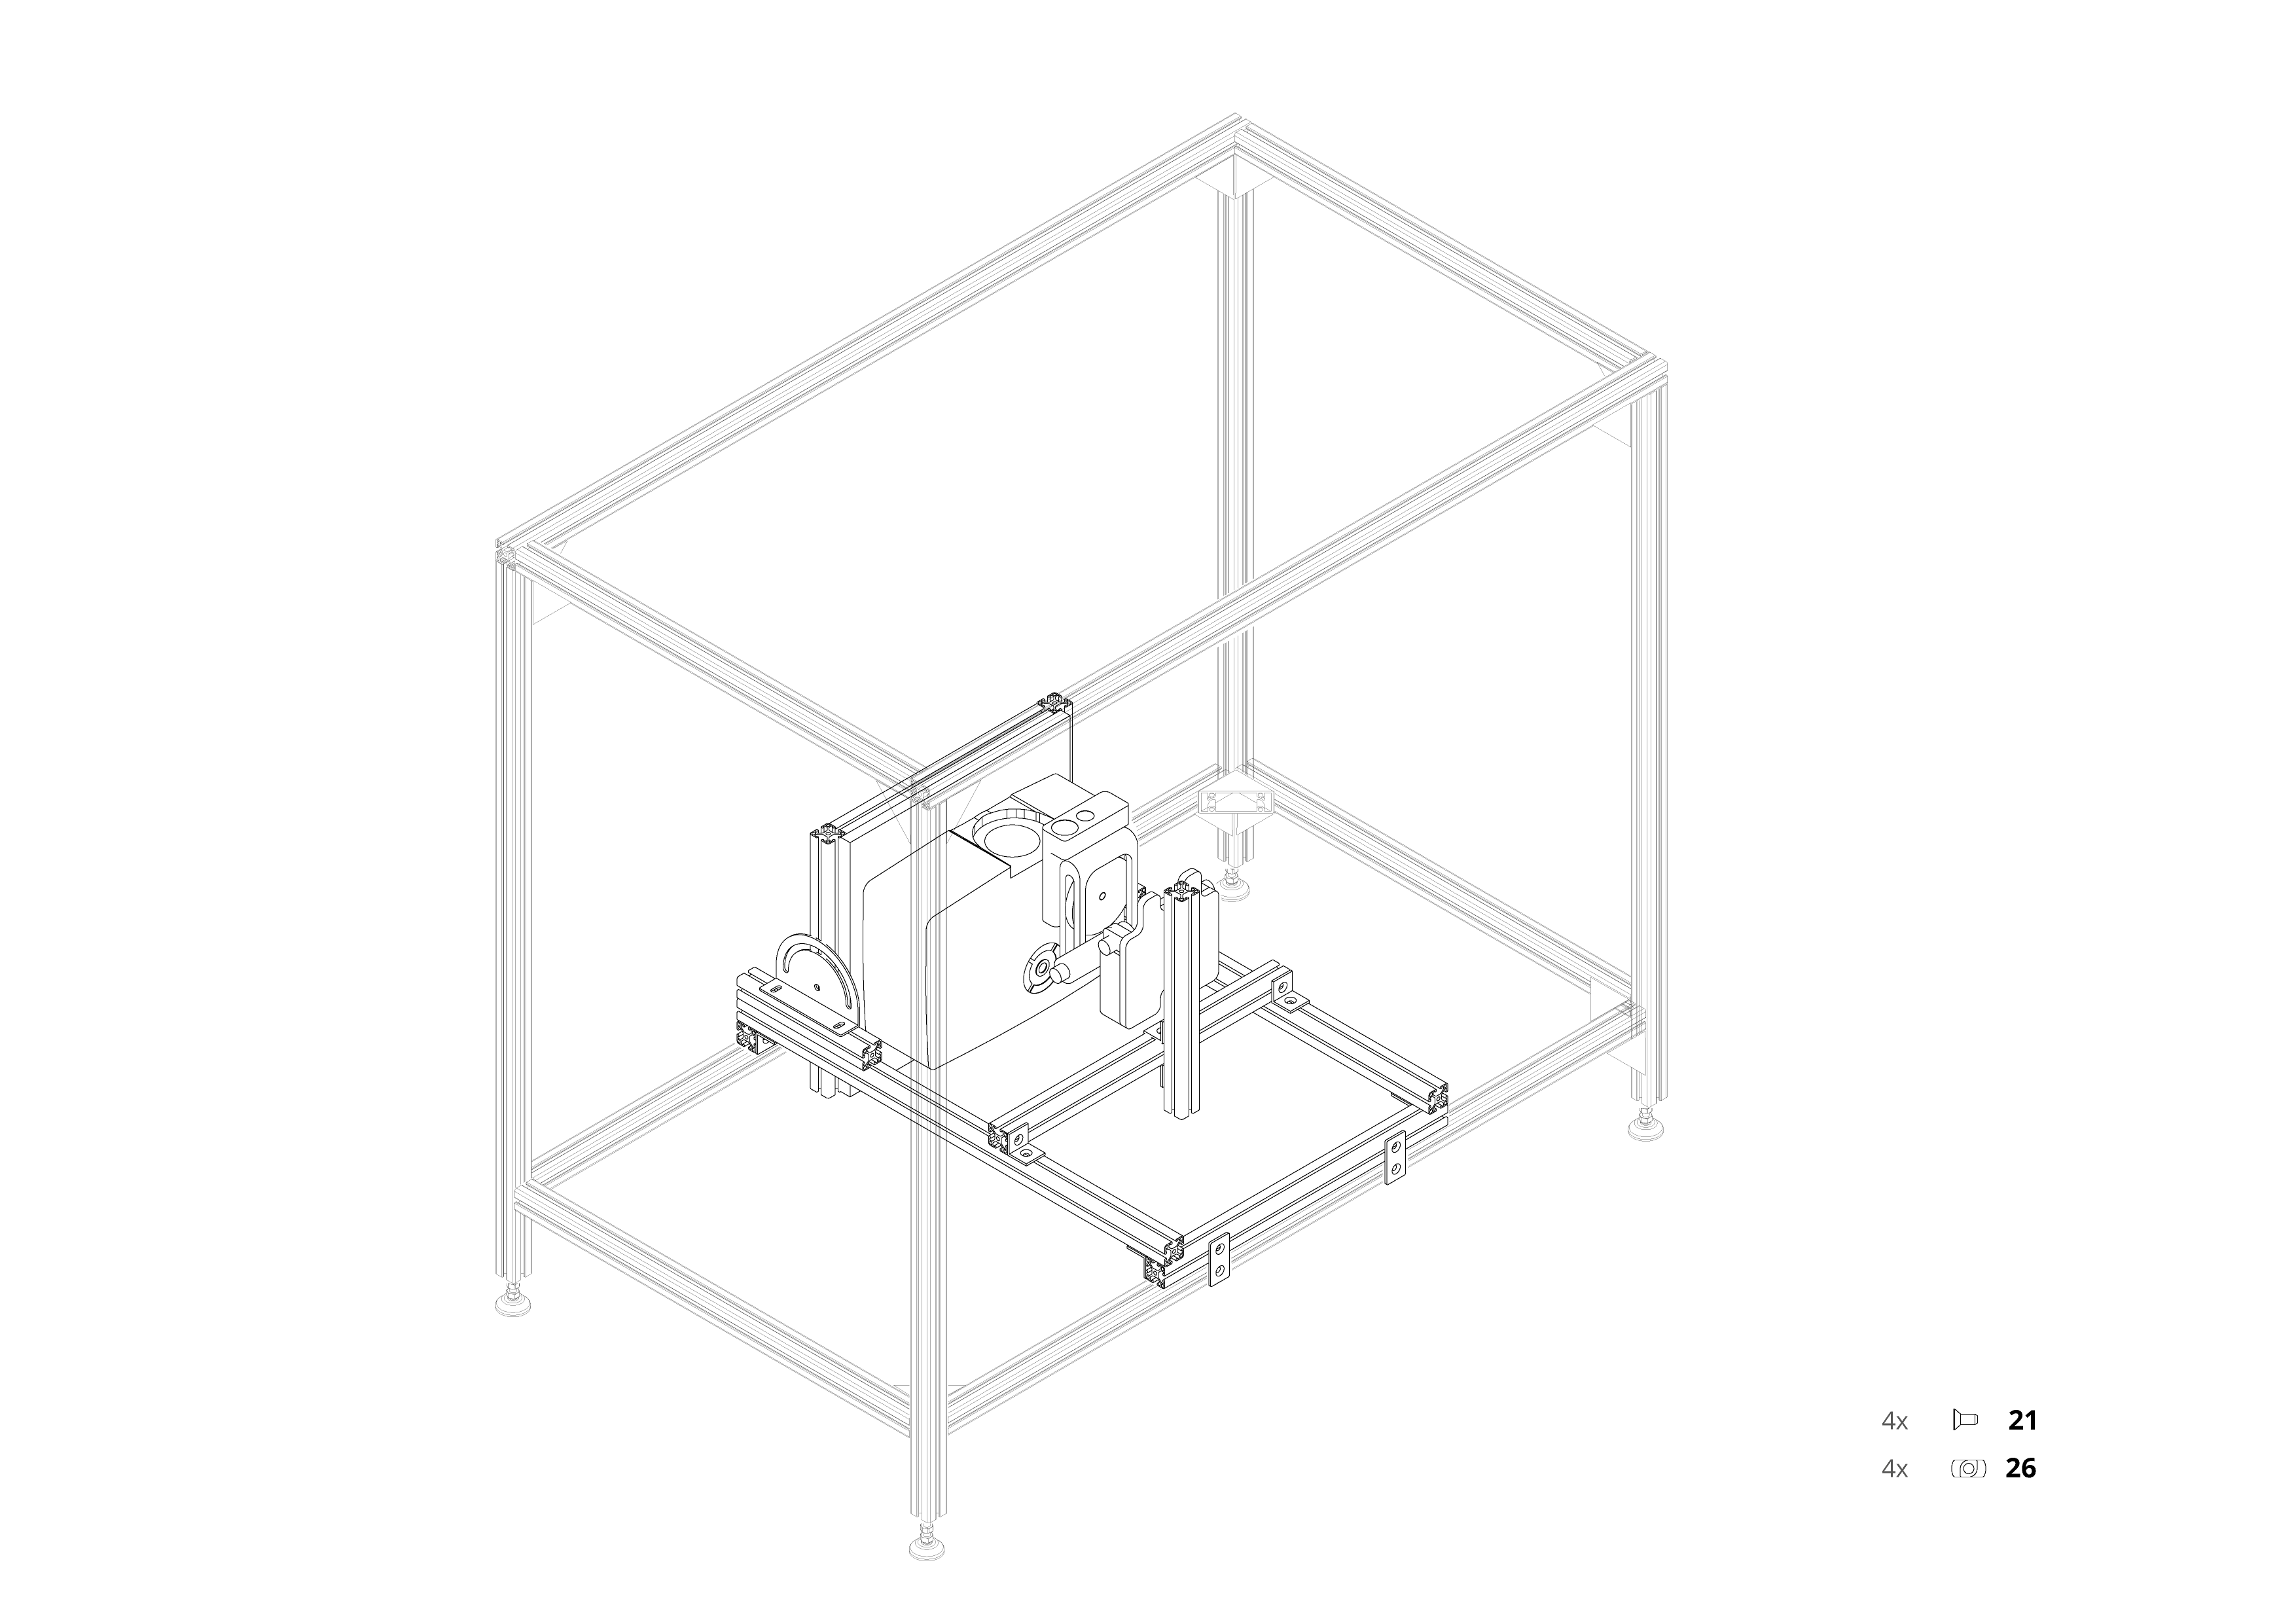
20 / 20