TrackingServer: Calibration View
Table-of-contents
Overview
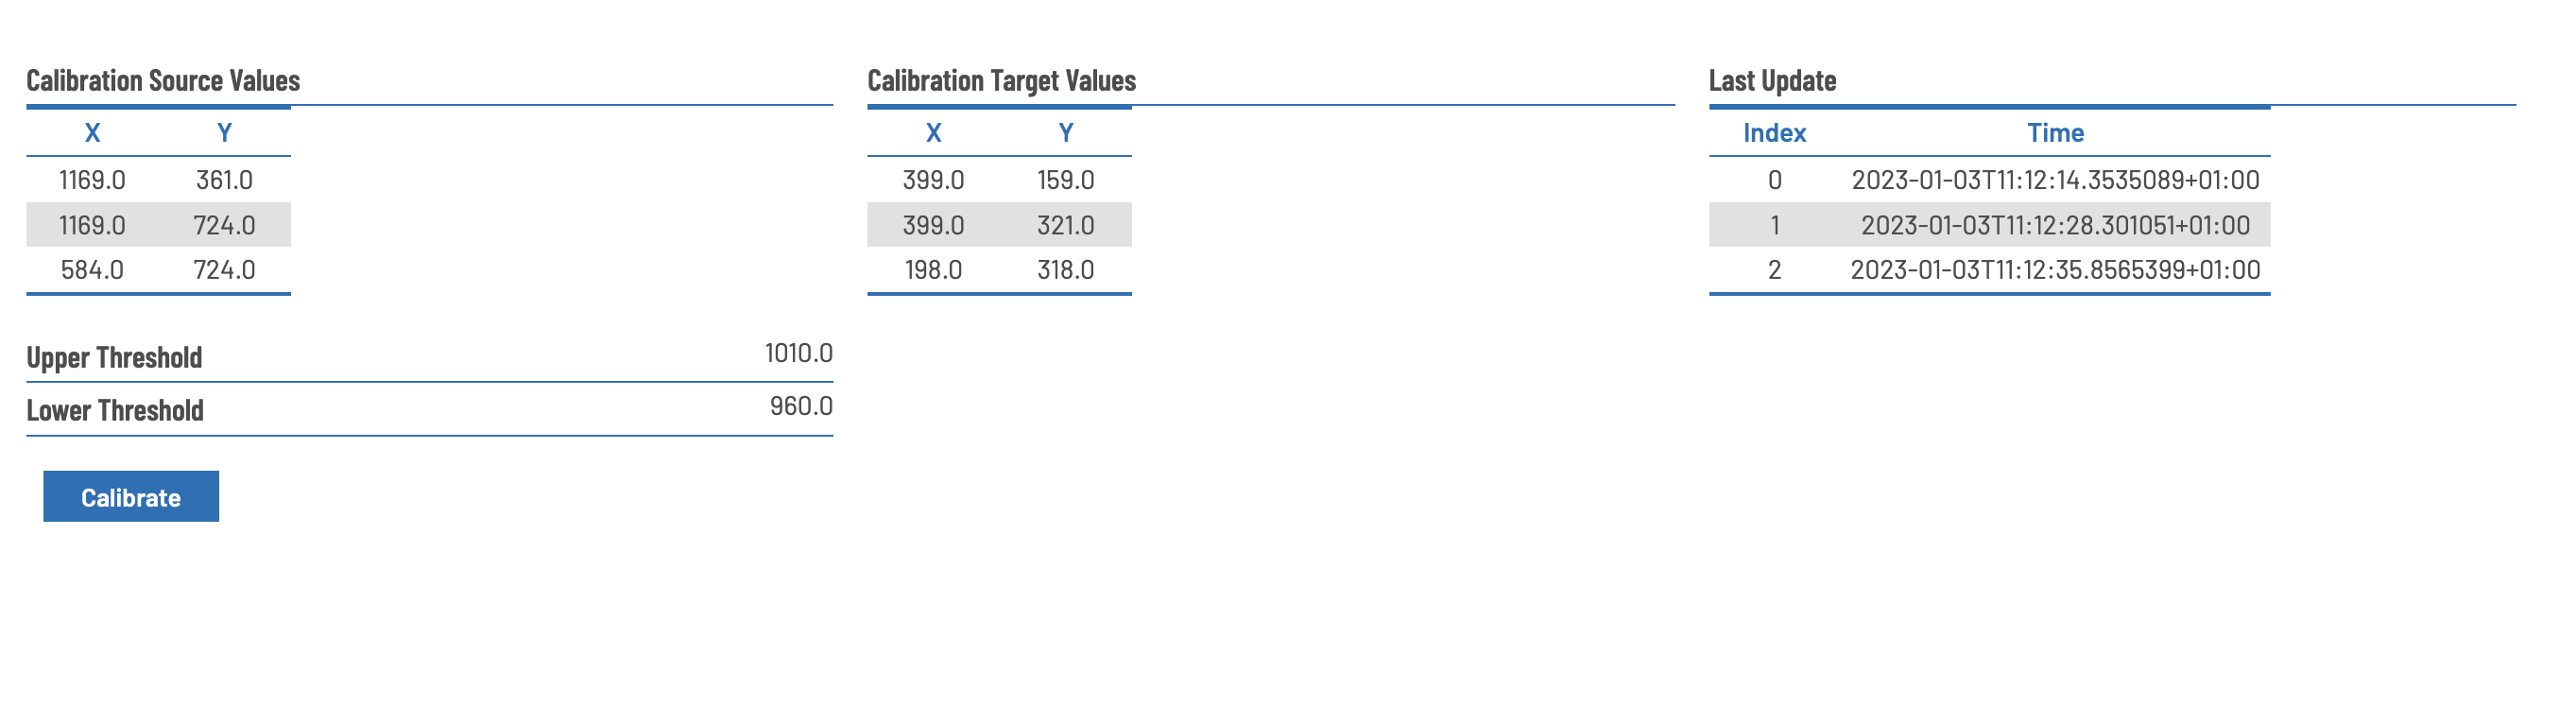
Calibration Values
Calibration Panel
Calibration Procedure
For calibration of viewport and mapping of depth camera coordinates start interactive Calibration
- Before Calibrating, activate interaction processing in Processing View
- Press
Calibrateto switch to Calibration mode - If not already displayed in fullscreen, now hit F11 to enter fullscreen mode
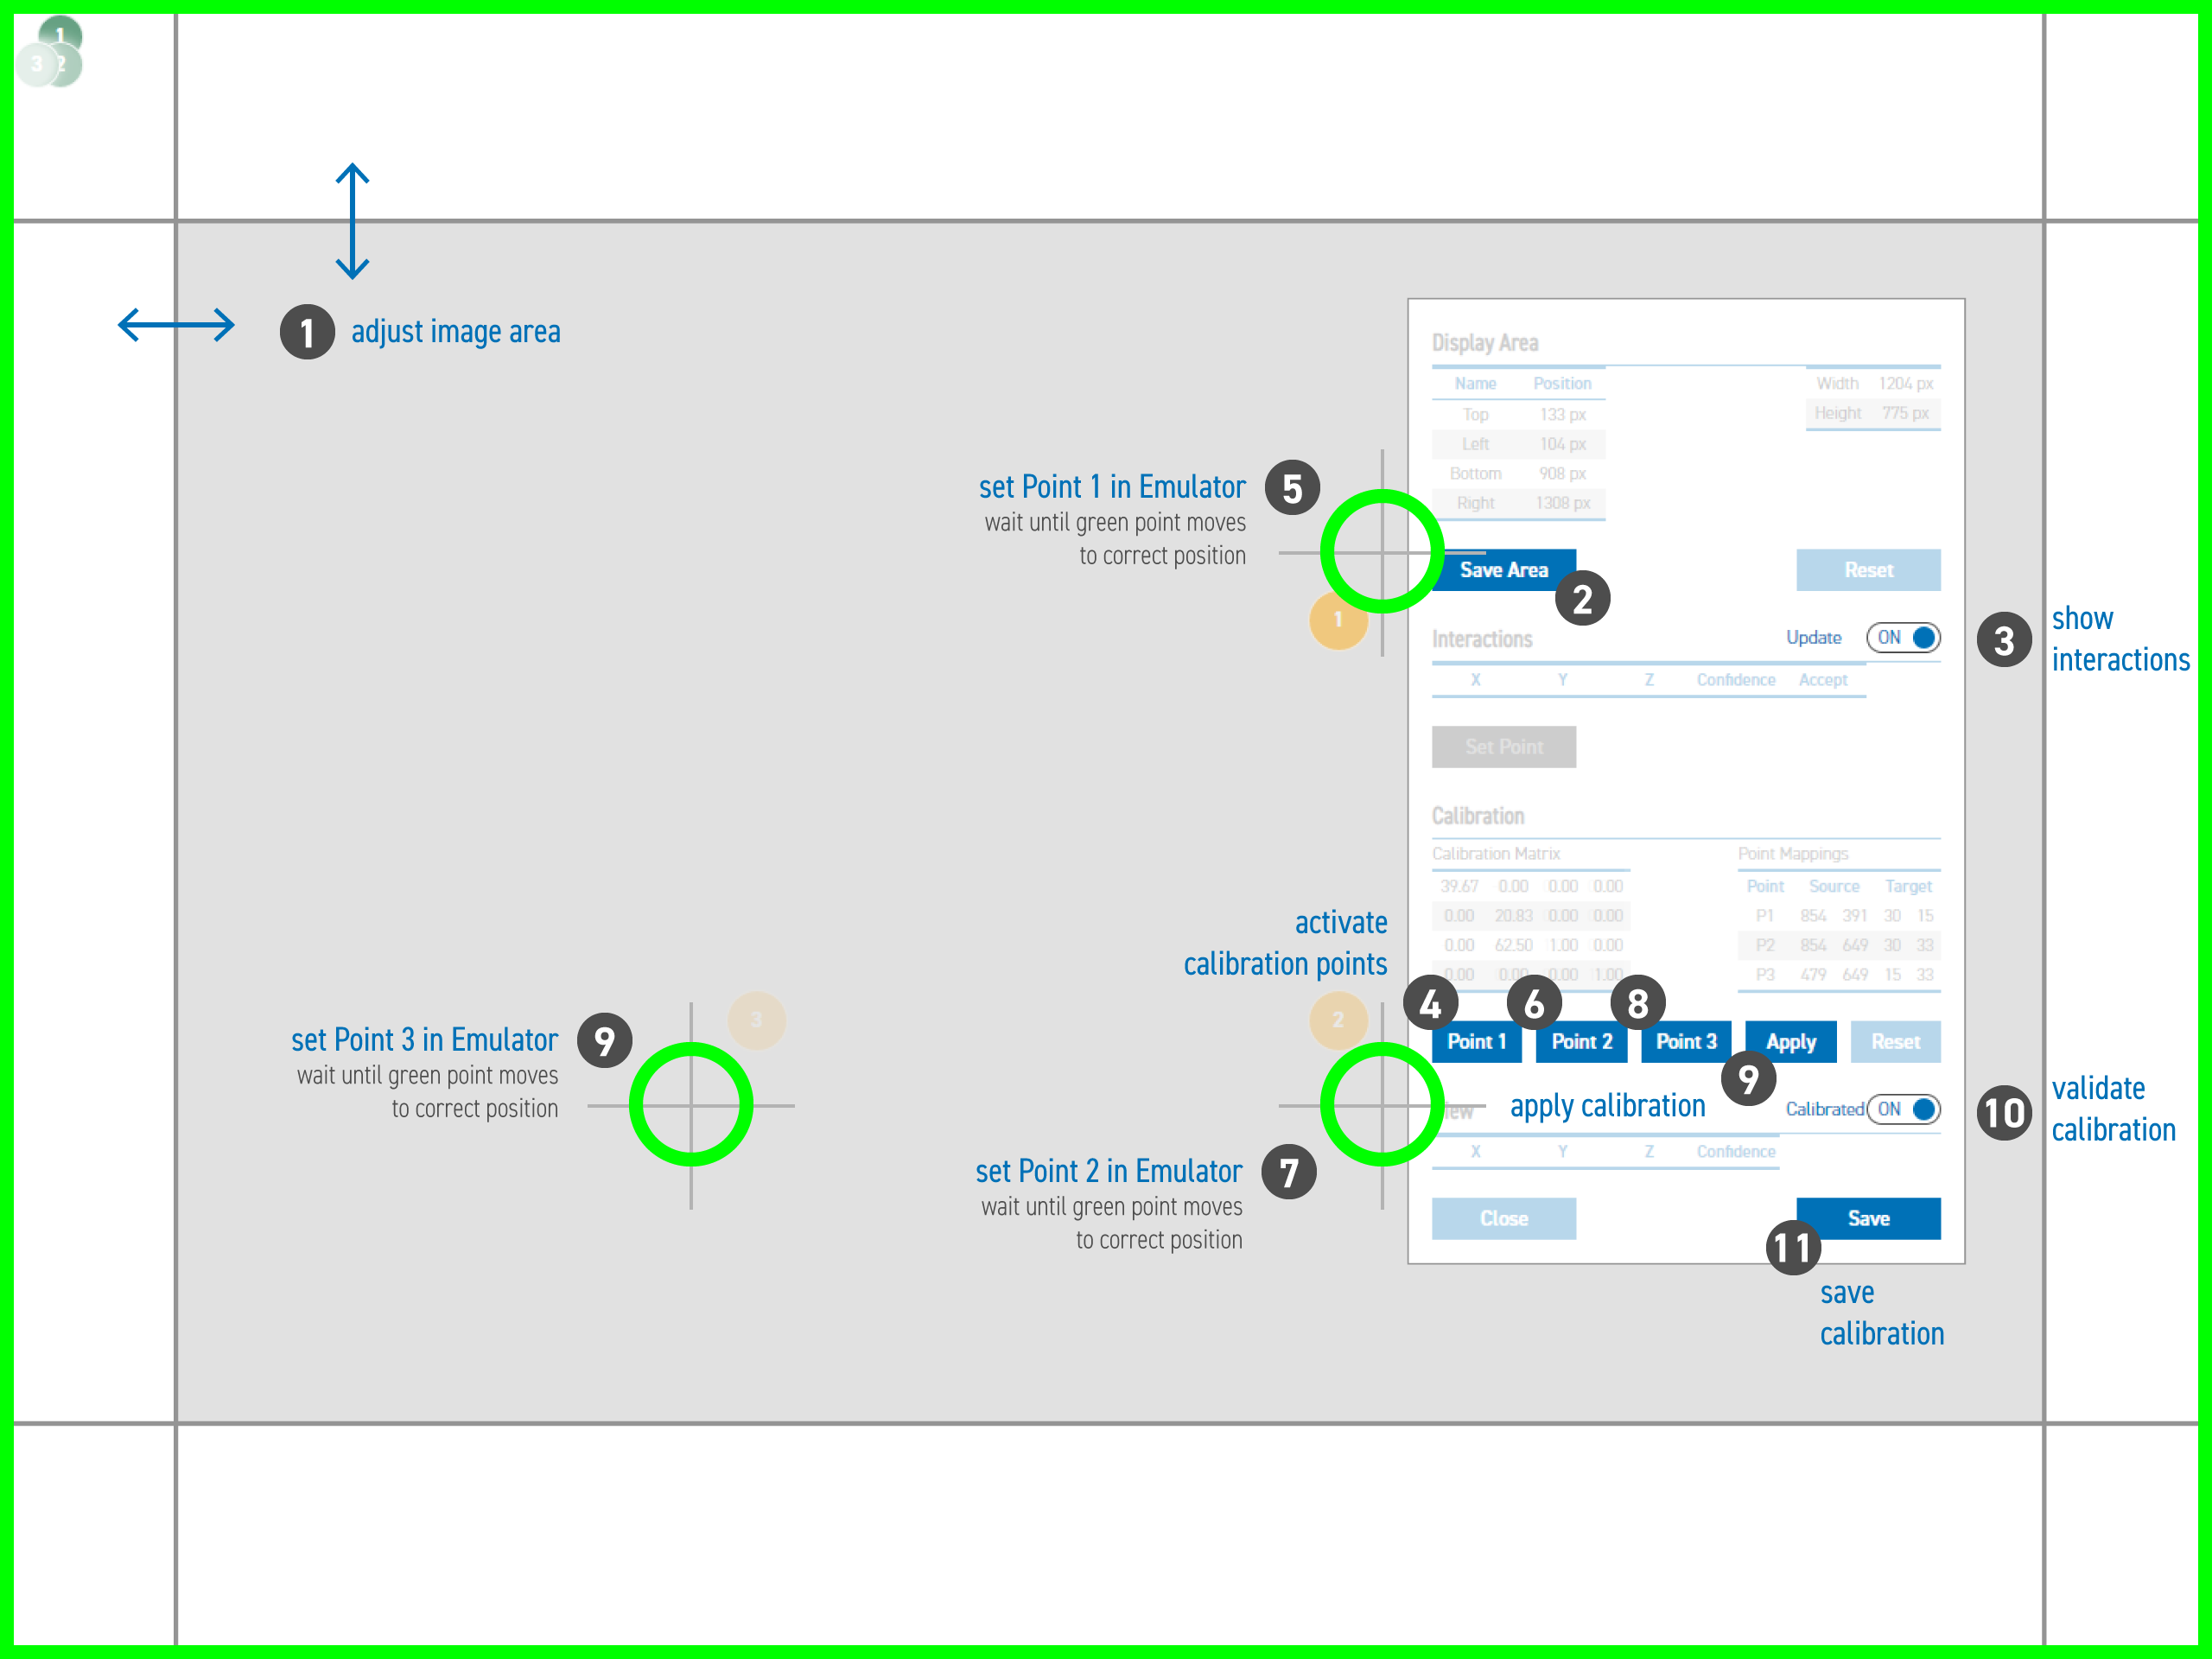
- Drag borders so the viewport fits to the projected area (1)
- Save border by Pressing
Save Area(2) - Turn on
Updateof interactions (3) - Now select the point to calibrate (Point 1, Point 2 or Point 3) (4)
- Push into the surface - Usually, only one extremum is displayed, and auto-selected. (5)
- after a short period, the selected point is confirmed automatically and the application proceeds to the next point
- Otherwise, click
Set pointto map this depth value to the calibration point.* If more than one extremum is displayed, pause auto-update and select the extremum-value, you find most appropriate - Repeat this procedure for all 3 Calibration Points. (6, 8)
- After setting all 3 Points, click on
Applyto compute the Calibration Matrix (9) - To validate you calibration, activate the
Calibratedtoggle. The displayed touch points should now be displayed in the correct positions (10). - Sometimes, it might be necessary to press
Save Areaagain afterApplyfor applying the calibration correctly (2) - Click
Saveto save calibration in the application settings (11)